






How to Test Power Bank Display Accuracy: Battery Percentage, LED Indicators and TFT Screens
A power bank can show 30% and shut off minutes later. Another may sit at 100% long after charging starts, then drop quickly once a phone is connected. For an OEM buyer, the question is not whether the screen lights up. It is whether the indication gives users a dependable warning before the output stops.
The practical test is a logged charge and discharge on a production-intent sample. Record the display at defined intervals, the electrical conditions, the point at which charging ends, and the point at which output shuts down. Then repeat the run at the loads the product is meant to support. A numeric percentage needs an agreed reference and tolerance; an LED bar needs agreed transition ranges. Either way, the low-battery behavior matters more to a user than a convincing-looking 100%.
What does the percentage actually mean?
The percentage normally represents an estimate of the battery’s state of charge (SoC). It is not a direct measurement of how many watt-hours a phone will receive. The output converter consumes some energy, and usable output changes with the load and the port or cable used. Texas Instruments defines SoC as remaining capacity divided by full-charge capacity; its gauge-verification guide also notes that available capacity changes with discharge rate and battery impedance.
This distinction prevents a common test mistake. Suppose a unit is labelled 10,000mAh and its USB meter records a smaller mAh total. That alone does not show that the percentage display is wrong: the battery rating and USB reading may refer to different voltages. Our power bank capacity test guide explains how to compare energy in watt-hours under stated conditions. Keep that capacity test, the SoC-display test and the advertised output-power test as separate records.
Nor is a cell-voltage reading a universal percentage reference. Analog Devices explains that terminal voltage depends on temperature and recent load; voltage-only monitoring can therefore misstate available charge. The buyer need not specify a particular gauge chip, but should ask how the proposed product estimates and updates the displayed value.
Freeze the display claim before you test it
Start with the exact SKU, cell or pack, PCBA revision, firmware version, display module and approved sample. A screen mock-up is useful for artwork approval, not for electrical acceptance. Write down what each number or icon claims to show. Does 100% mean charge termination, or merely that the display has rounded up? Does the screen show battery percentage, estimated time, USB-C output power, or a mixture of these? If the answer varies by firmware mode, capture each mode in the specification.
Der YULIDA-Leitfaden zu A217 strap-cable model has a digital battery readout, but its product page asks buyers to verify display accuracy on the approved sample. The AJ26 TFT model likewise lists a screen while leaving its displayed values, update interval and accuracy to sample approval. These are examples of why a buyer should not infer a tolerance from a product photograph.
Put pass/fail limits in the order specification before samples are signed off. There is no honest universal “±2%” rule for every power bank display: the gauge design, test conditions and definition of the reference all matter. If a supplier quotes an accuracy figure, ask for the method, operating range and data behind it.
A test the buyer and factory can repeat
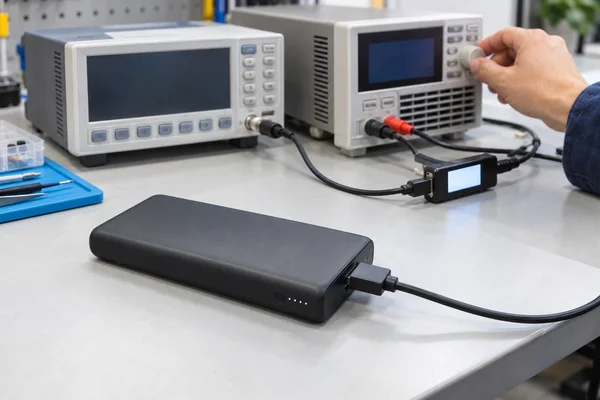
For a numeric display, request a lab run that records time, cell or pack current, voltage, temperature and indicated SoC. The reference SoC should be calculated from measured charge through a defined full-to-empty cycle, with the full and empty endpoints stated. TI’s gauge verification method uses a logged charge/discharge cycle and compares reported SoC with an integrated-current reference. Its procedure is a useful technical reference, not a claim that a finished YULIDA unit uses TI hardware.
An importer usually cannot access internal pack-current data without the supplier’s engineering support. A USB meter at the output is still useful for recording delivered energy and shutdown behavior, but it is not a direct SoC reference. If internal data are unavailable, call the exercise a display-behavior and repeatability test. Do not report a numerical SoC “accuracy” result derived solely from USB-output mAh.
Use this sequence for the approved test plan:
- Identify the sample and the revision of its cell, PCBA and firmware. Record the meter calibration status, ambient temperature, input source, output port and cable.
- Charge according to the product specification. Record when the display first reaches 100%, when input current tapers and when the product declares charging complete. State whether a rest period is required before discharge.
- Discharge with a defined electronic load or representative device until the output ends. Log the display over the whole run, with denser observations near the agreed low-battery threshold. Photograph or video-record abrupt jumps, a frozen value, warning icons and the final reading before shutdown.
- Recharge and check that the indication moves in the expected direction, reaches its declared full state and behaves consistently after the next discharge starts.
- Repeat at a second load that represents actual use. If the product promises simultaneous output or a high-power mode, include those conditions separately rather than treating one gentle 5V run as proof for every use case.
Keep the raw log. A table containing only “pass” gives a future inspector little to compare with a production lot.
Judge the last 20% carefully
Low-battery complaints often come from the end of the curve. A user may accept a display that rounds by a few points; they are less likely to accept a bank that shows 18%, shuts down, and offers no warning. Check the reading just before the warning appears, the interval between warning and shutdown, and what happens if the user changes from a light load to a higher one. Record a thermal or over-current protection shutdown separately from normal battery depletion, so it is not mislabelled as a gauge error.
A displayed percentage may move after the load is removed or temperature changes. That movement is not automatically a fault: the battery estimate can be revised as conditions change. What matters for acceptance is the agreed behavior and whether the product gives a misleading promise of remaining use. Set separate limits for steady-load error, allowable jumps, update delay and low-battery shutdown if the application needs them. Test any claimed runtime estimate as its own feature; 20% remaining does not guarantee a fixed number of phone-charging minutes.
LED bars and TFT screens need different checks
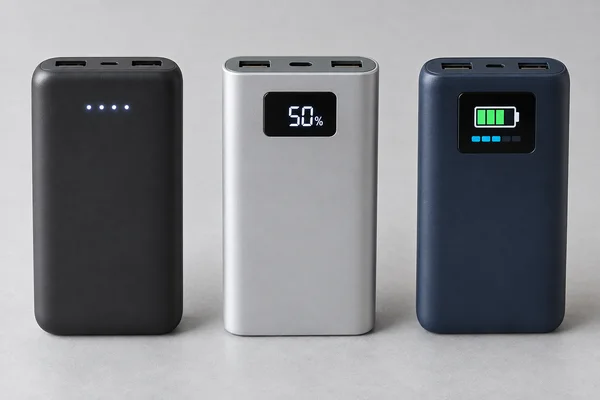
Four LEDs are a coarse indicator, not a percentage meter. Ask the supplier for the intended range of each bar while charging and discharging, including the flashing pattern. Photograph the transitions on the way down and up. If the LED logic has hysteresis, document it so an inspector does not mistake a deliberate delay for a defect. Most importantly, verify what the final illuminated bar means before the output ends.
A TFT can show several values at once. Treat each field as a separate claim. Battery percentage follows the SoC procedure above. For a displayed USB voltage, current or wattage, compare the screen with a calibrated instrument at the specified measurement point and operating mode. Check the update delay when a device connects, changes power contract or disconnects. Also inspect the display as a physical part: poor readability, missing pixels and a screen that does not wake as specified are failures even if the underlying number is sound.
Der YULIDA-Leitfaden zu TFT product category says the fields and behavior depend on model and firmware. For an ODM interface, approve the actual operating screens and version, not just a rendered design.
Move from one good sample to a shippable lot
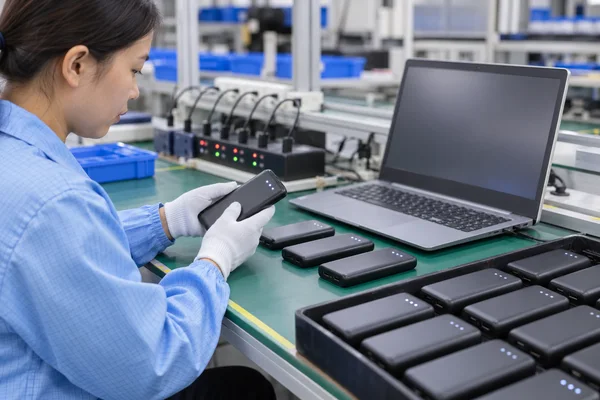
Keep a signed production-intent sample and its test log. The production inspection should then draw units from the finished lot under the agreed sampling plan. Record the SKU, production lot, cell lot, PCBA and firmware revisions, measured results, defects and disposition. A change in cell, board or firmware can change the display curve without changing the outside of the product.
Der von YULIDA veröffentlichte Qualitätskontrollprozess includes display accuracy in electrical-function checks and says limits follow the approved model specification. That is the right starting point for a buyer request: ask which checks apply to this SKU, how many units are tested, and which raw records will accompany the shipment. The wider product-specification guide helps place display states and tolerances alongside the electrical requirements.
Before release, the sample, specification, test data and production-lot identity should describe the same build. If the lot differs, reapprove the changed configuration and repeat the affected tests. A screen that looks right does not resolve a mismatch in the production records.
Häufig gestellte Fragen
1. Is a power bank percentage display supposed to be perfectly accurate?
No display can guarantee a fixed percentage error under every load and temperature. Agree a reference method, conditions and tolerance for the specific product. Check low-battery warning and shutdown behavior as well as the average error.
2. Can I test the percentage with a USB power meter?
A USB meter can show delivered output energy and the point of shutdown. By itself it cannot provide a true internal battery SoC reference because the output path includes voltage conversion and loss. Ask the supplier for pack-side measurements if a numeric SoC-accuracy claim must be verified.
3. Why does 100% stay on screen while the power bank is still plugged in?
It may be display rounding or the product’s chosen full-charge indication. Check the approved definition of 100% against the recorded charge-termination behavior. Do not assume the number proves charging has stopped.
4. Why does the percentage jump after I connect a laptop?
A higher load can change battery voltage and the gauge’s estimate of remaining charge. Test the proposed model at its intended load, then compare the jump with its approved limit. If output stops because of power or temperature protection, investigate that event separately.
5. What should an OEM buyer put in the purchase specification?
Identify the display fields and modes, reference measurement method, charge and discharge conditions, update delay, warning threshold, accepted error or LED transition ranges, and the firmware revision. Add a lot-sampling plan and require records that identify the units tested.
6. Do Der von YULIDA veröffentlichte product pages state a universal display-accuracy tolerance?
No. The cited A217 and AJ26 pages call for model-specific verification. Request a production-intent sample and an approved test report for the exact configuration you plan to order.
